The horizontal menu is displayed below the main header, where you can see your logo, hamburger menu and search icon.
This menu will only work with categories, the idea is to give app users a quick way to navigate between the different categories of your app.
Similarly to most menus in the MobiLoud platform, you will need to create a WordPress menu and then assign it accordingly.
So let’s get started with the configuration of your horizontal menu:
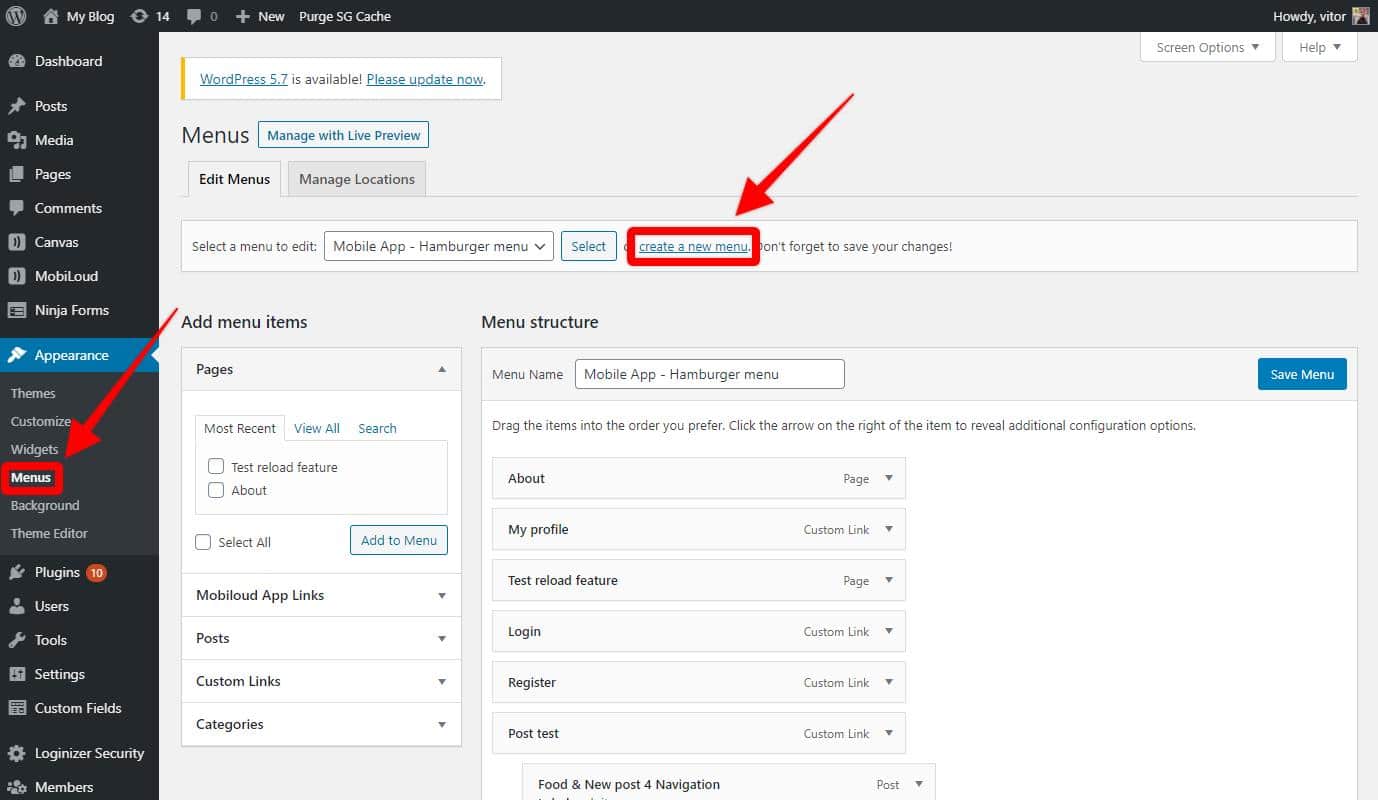
1 – In your WordPress Dashboard, go to “Appearance > Menus” and click “create a new menu”.
2 – You can now drag and drop the different types of links into the newly created menu
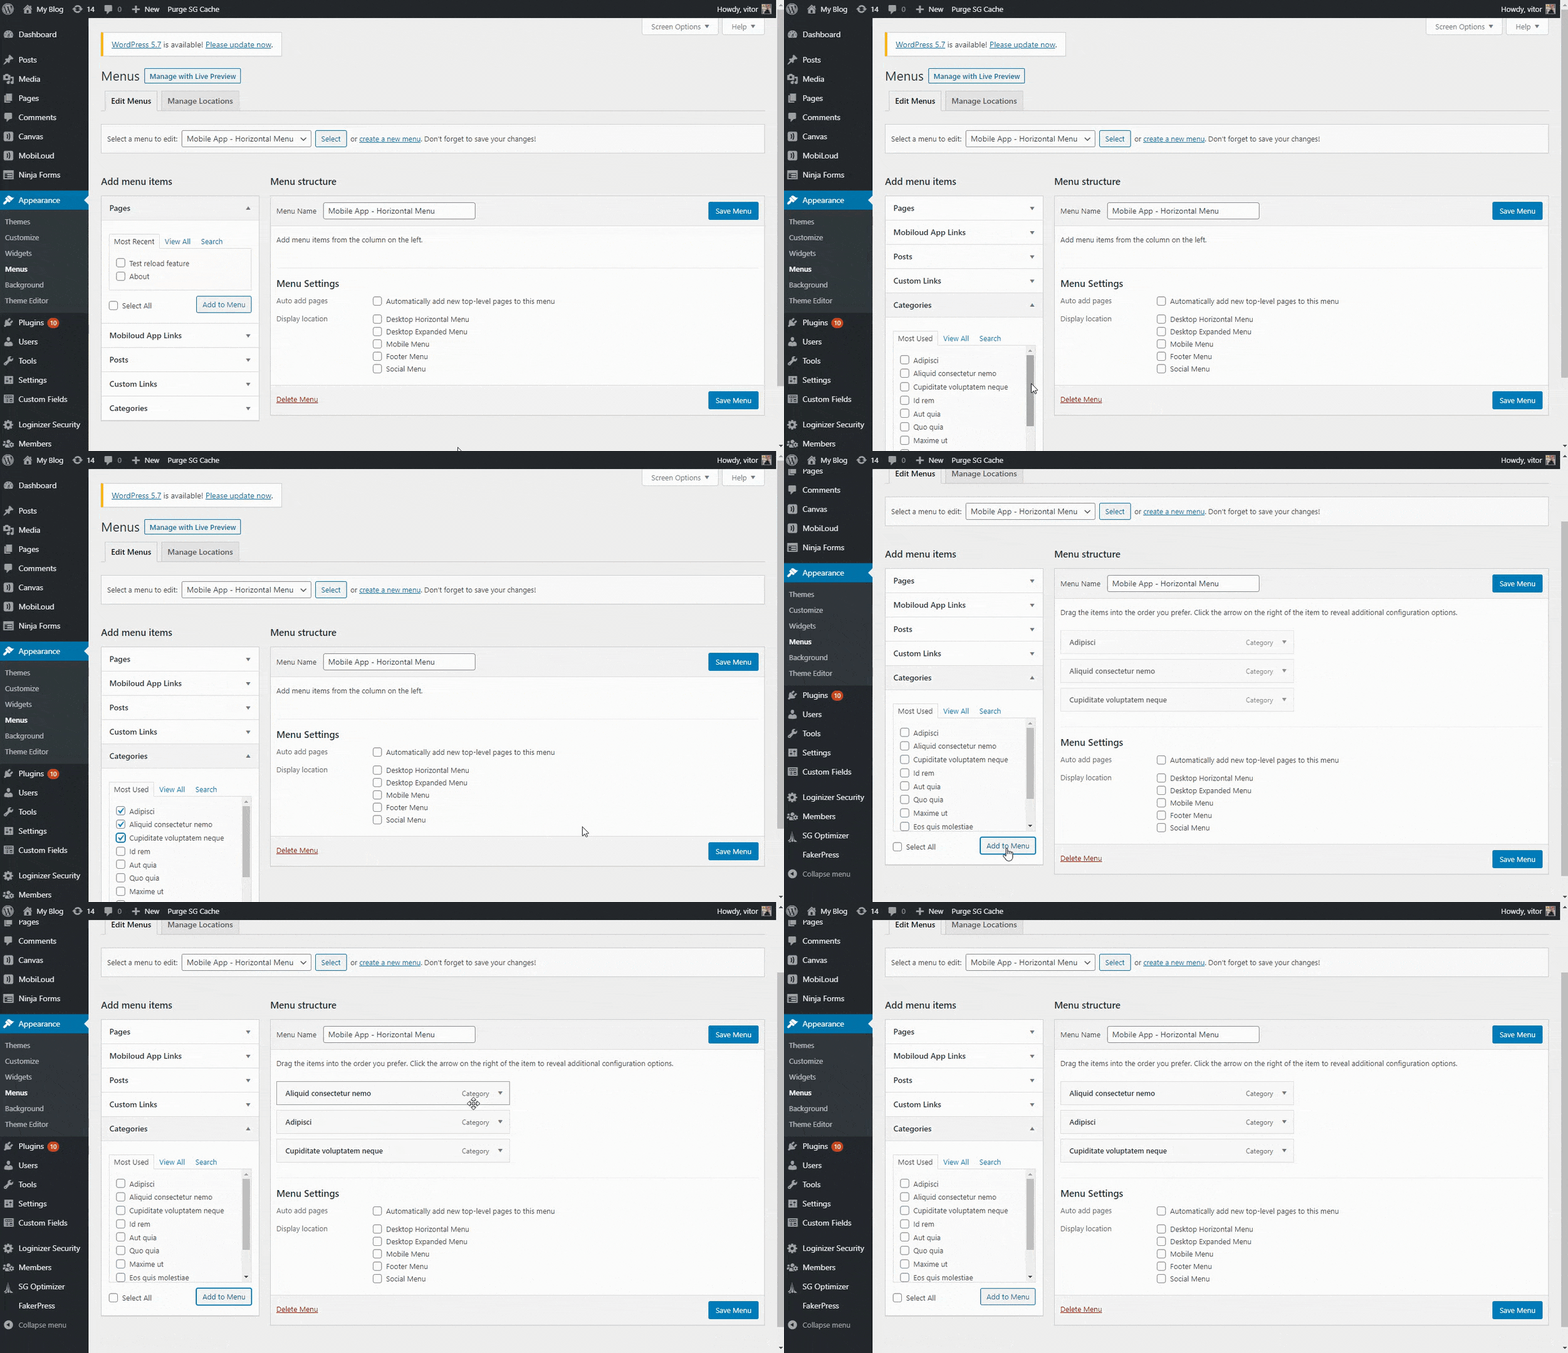
3 – Once you have organized the menu according to your requirements make sure to save it
4 – Now go to “MobiLoud > Configuration” and access the “Menu” area
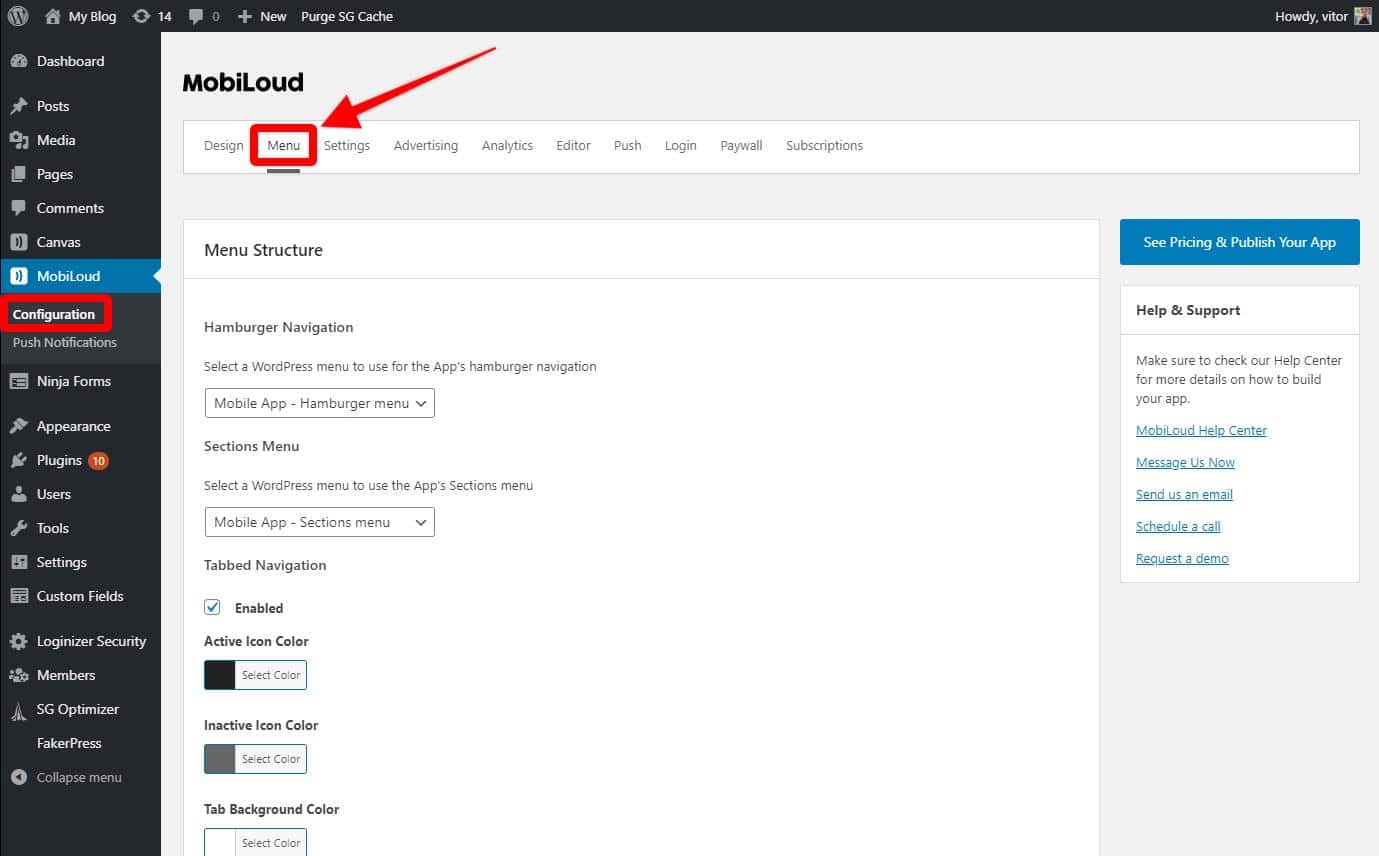
With your menu created, you will want to assign it to the app, in case you have the tabbed menu disabled, or to a specific tab.
Tabbed menu disabled
If the tabbed menu is disabled in your app you will want to configure your horizontal menu in the following setting:
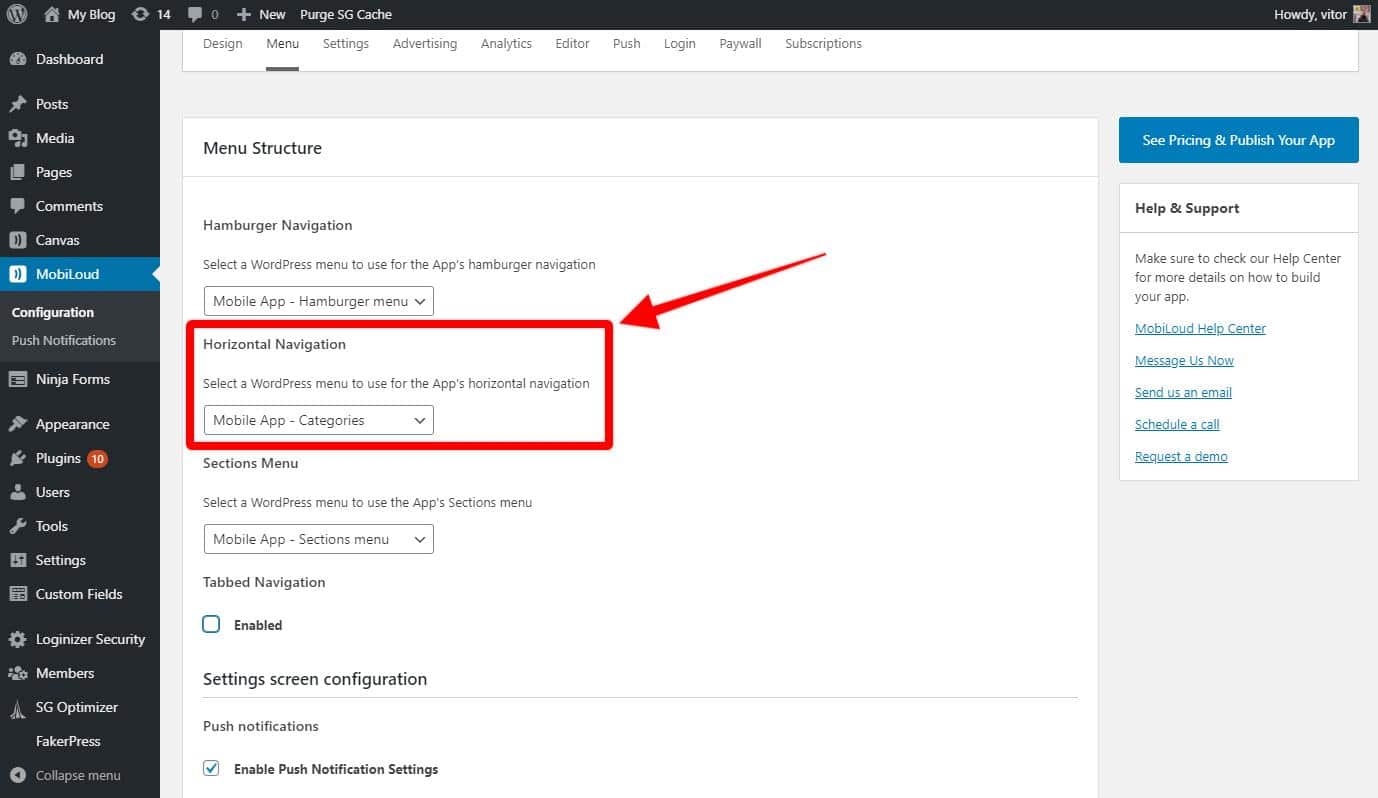
Remember, this setting will only be displayed if the tabbed menu is disabled
Tabbed menu enabled
If the tabbed menu is enabled, you will be able to configure the horizontal menu individually for each one of your tabs, as you can see below:

You will also want to adjust the First Item Label accordingly:
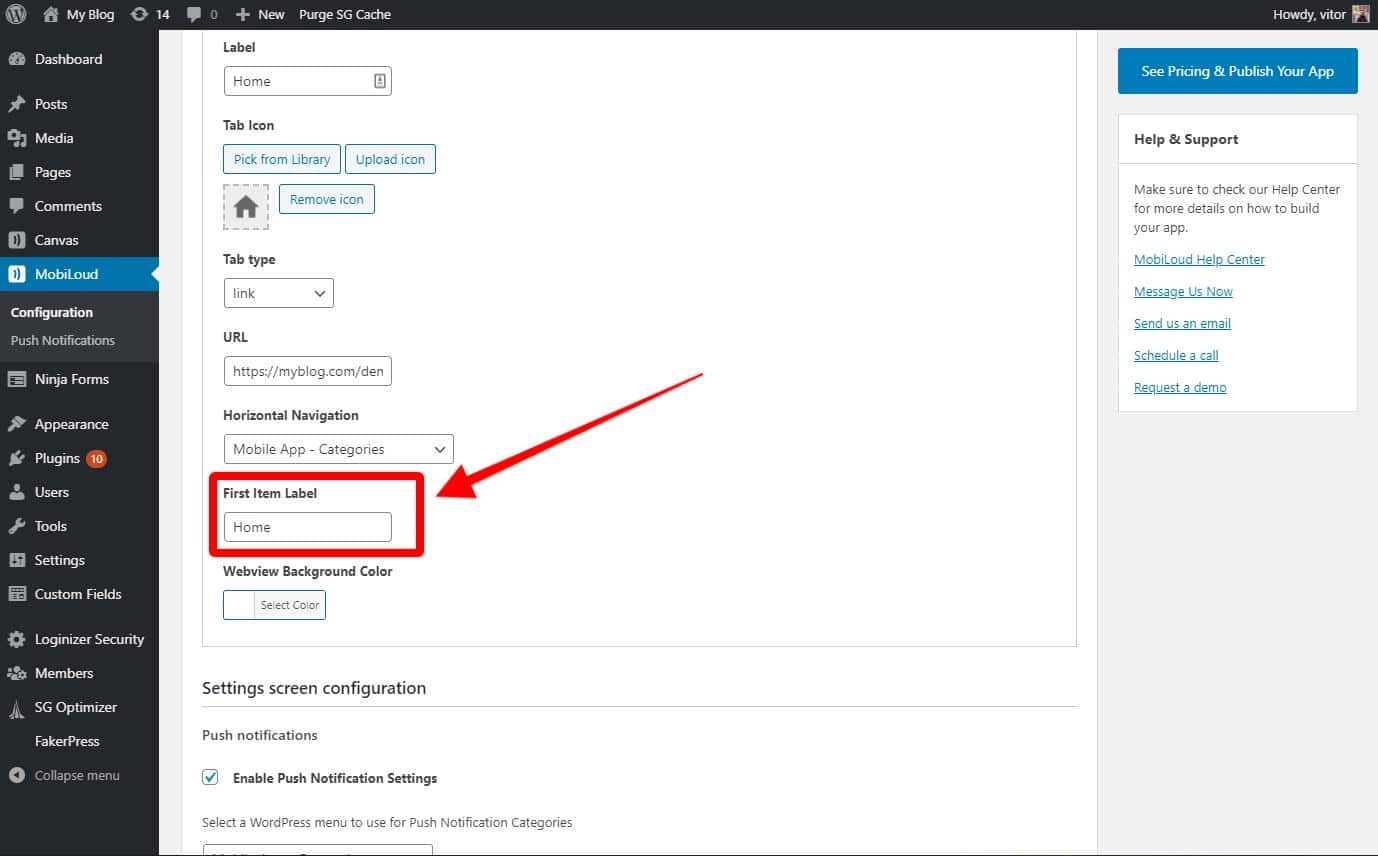
This is the text that will be displayed in the first item of your horizontal menu, in this case, the tab’s content.
